I first wrote this piece for My Dream Wedding on how to achieve the perfect wedding makeup that reflects you and your style but also allows you to enjoy the morning preparations without any stress or worry.
Your wedding day is probably one of the biggest occasions in your life and every woman wants to feel and look amazing. So I’ve put together a few tips on how you can start planning so that your skin and wedding makeup will be just as perfect as the day itself!
6 Months To Go:
To start off, there is only so much magic we can do with makeup. The real secret to amazing skin is starting from within and creating good habits months ahead. One of my biggest tips and one I swear by is to make sure you’re drinking plenty of water. It’s a well known fact that diet plays a huge role in achieving great skin so try keeping a bottle of water handy at all times. Also try to cut down on tea, coffee and alcohol as these can add to skin dehydration. If you don’t already, start eating plenty of fruit, vegetables, whole grains and protein such as chicken and fish and cut back on processed and sugary foods. This will be hard – speaking as a major chocoholic, I know – but once you see the benefits it will be worth it!
Get into the habit of cleansing, toning and moisturising your skin every day and night and exfoliate gently twice a week to get rid of any dead skin that can make your skin look dull. Don’t use anything too harsh though as it can actually irritate your skin and do more harm than good.
3 Months To Go:
I would recommend going for a couple of facials a few months before the big day. Apart from being great for pampering the skin, planning a wedding can be stressful and this can show on your skin so taking time out to relax will do you the world of good.
If you have any very dry area’s of skin, for example elbows or lips start using something like Elizabeth Arden 8 Hour Cream on the area to really soften it and after a few weeks you should see a big difference.
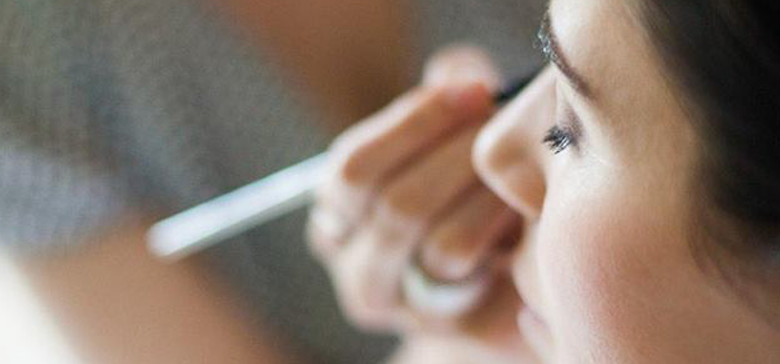
If you haven’t already thought about this yet you should start deciding on the makeup look you’d like for your big day. Then decide if you’d like to hire a makeup artist, go to a makeup counter or do it yourself.
Unless you are very sure you know you can achieve a flawless, long lasting look by yourself I would recommend getting your makeup done by a professional. If you do this it is a good idea going for a trial. This is the only way to be completely sure you get the look you want and are comfortable with it on the day itself. If you plan on having a fake tan I would have this done for the trial also and if possible maybe have your hair trial the same day so you can see the whole look together. You get a much better idea then of what you might like to change. Have your makeup trial as early in the day as you can. This way you can see how it lasts throughout the day. There’s no real point having it done at 6 in the evening, going home and then taking it off as you won’t really get to see how it will perform for you on the day. I would also suggest taking some pics at the trial. Sometimes you might think you look over done or not done enough but in photographs you will get a much better idea or how you might look in your wedding photographs.
Have your eyebrows shaped around this time too so you get a shape you’re happy with and can maintain up to the day or if you’re growing your eyebrows this will give them time to grow.
The Day Before:
Don’t have any treatments such as facials or waxing done the day before your wedding, especially if you haven’t had them before. The last thing you want is to have a reaction or break out in spots and you have to hide it.
Make sure you get a good night sleep that night also, or even a couple of nights before if possible, so you’re bright eyed and fresh in the morning. The mornings can be chaotic and you need to be able to cope with anything the day throws at you. If you’re tired and stressed you’re more likely to worry over small things and not enjoy the day as much.
The Big Day:
If you can, eat a good breakfast which is high in protein such as scrambled egg with a couple of rashers, a yummy omelette or a big bowl of porridge with some fruit. This will keep you feeling fuller for longer and give you the energy you need for the morning ahead.
Have your skin cleansed and moisturised ready for your makeup artist although most artists will do this for you before they get to work.
Wear a top that opens down the front so that when your hair and makeup is done you just have to slip it off to get dressed and don’t have to pull anything over your head.
I would allow 45 minutes to 1 hour for your makeup to be done. If you have bridesmaids and guests that need their makeup done as well take all this into account. A good idea is to have a timetable worked out so that you give everyone plenty of time and leave some time at the end for any touch ups.
Have an area of good natural light free for having your make-up done as this what the makeup artist will need to work at their best or if you’re doing your own make-up this will make it easier for you to see what you’re doing.
If you’re using a sun screen don’t use one that’s too high a factor as this can cause your face to look white in flash photography.
Use products appropriate for your skin type. I love primers and think they really help the makeup sit well on the skin and last longer. However, if your skin is oily you might need a primer that mattifies the skin or something like MAC Oil Control Lotion and you may not need to use a moisturiser as well, as this could be too much moisture for your skin and make it too oily. If you have dry skin, use products that are moisturising and don’t make your skin feel tight.
Pick a foundation that matches your skin colour perfectly. If you like to look sun kissed or tanned don’t use your foundation to achieve this, you can use bronzer later. Also, your foundation should only be used to even out your skin tone and not hide any marks or blemishes, that is what concealer is for.
Use a concealer the same colour as your foundation to hide any imperfections on the chin, around your nose or on any spots or imperfections you might have but use a lightweight, creamy concealer under your eye’s to hide any dark circles. You can go a shade lighter here but not too light or you’ll look too white in your photographs.
Use a lightweight, translucent powder to set your foundation and concealer where needed.
Waterproof mascara is a good idea for any bride. Even if you’re not usually one for tears it’s always good to be prepared just in case!
If you’re wearing false lashes, use an eyelash curler first so that the lashes sit perfectly with your own. You can then apply another coat of mascara on top so they sit seamlessly. I normally use individual lashes. They look much more natural and last longer than the strip lashes because they sit between rather than on top of your own lashes.
I’m a huge fan of eyebrows and thanks to the like of Cara Delevingne and the Kardashians, brows are back with a bang! I think they really frame the face so use a matte eye shadow or eyebrow pencil, a slightly lighter shade than your hair, to fill in any gaps and define the brows. The difference will be amazing!
A beautiful highlighter such as Becca Shimmering Skin Perfector looks gorgeous on brides, dusted on the top of the cheeks and blended into your blusher or along your collar bone and shoulders but be careful not to use too much as the flash photography will pick it up. Equally, don’t go for anything glittery on your eye’s, as much as we ladies love a bit of glitter, this will just look awful in your photographs. As a general rule, a little shimmer is ok, glitter is a no, no!
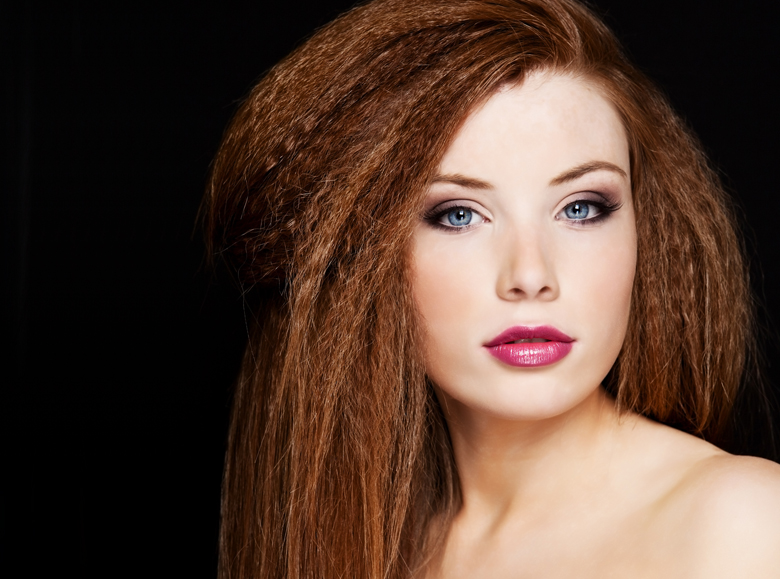
Neutral or pale lip colours tend to look washed out in photographs so go for something a little brighter than you would normally wear. Pinks, plums and rose colours work really well on brides and make your teeth look whiter too. Corals are another beautiful option if you don’t like pinks. To make sure your lip colour lasts longer use a lip liner. Fill in the whole lip as well as lining them so they look flawless and there’s no visible line.
The aim of your makeup is to make you feel and look like yourself only better so don’t go for a drastic change in what you’re used to. If you normally wear very strong makeup then going very light and understated will feel wrong for you, while if you never wear makeup going for a strong eye and dark lips will be far too overpowering for you. Play up your best features, whether it’s your big brown eye’s or fabulous Angelina Jolie lips. You want people to say how amazing you look… your features should do the talking, not the makeup!
Ultimately, you want to feel amazing and happy on your big day and while your makeup artist will be there to give you advice on what will look good and show you how to achieve it, only you know yourself what you want. If you’re not happy with what they have suggested don’t be afraid to say so and work together to get you the look that you love!
One last tip is to have one of your bridesmaids or friends carry a little emergency kit around on the day. Have a lipstick or lip gloss, blush, blotting paper or some powder – if you tend to get shiny, a couple of cotton buds for teary eye’s or touch ups and maybe a little sewing kit, a needle and thread will do, for those hem/button emergencies!
I hope some, if not all of these tips and advice will help you through the preparation for your big day and make looking your best even easier, then all you have to worry about is enjoying the day and taking all the compliments from your guests!
Happy Planning x